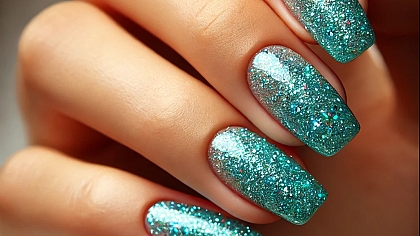
Ombre Obsession: The Girl’s Guide to Dreamy Gradient Nails
Ombre nails have taken the nail art world by storm, and for a good reason! This gradient style, where one colour fades seamlessly into another, gives your nails a fresh, modern look that’s both chic and versatile. Whether you want a subtle transition from nude to pink or a bold, daring blend of neon shades, ombre nails allow for endless creative possibilities.
Perfect for any occasion, from casual outings to elegant events, ombre nails can be customized to fit your personal style. The best part? You don’t have to be a pro to master this trendy technique! With a little practice and the right tools, you’ll be able to create stunning ombre nails at home. Let’s dive into the world of smooth transitions, flawless fades, and eye-catching colour combinations that make ombre nails a must-try for anyone looking to elevate their manicure game.

Tools and Products You'll Need
Before you start creating your gorgeous ombre nails, you’ll need to gather a few essential tools. Having the right supplies makes a world of difference in achieving a smooth, seamless gradient. Here’s a quick rundown of what you’ll need to get started:
Base Coat: A good base coat is key to protecting your natural nails and providing a smooth surface for the polish. It helps the colour adhere better and prevents staining, especially if you’re using darker shades.
-
Two or More Nail Polish colours: The fun part! For ombre nails, you’ll need at least two polishes in colours that will blend well together. You can go for soft pastels, bold neons, or even metallics—whatever fits your style! We’ll discuss colour combinations later in more detail.
-
Makeup Sponge: This is your secret weapon for that perfect gradient. A clean makeup sponge will help you blend the colours smoothly across your nails, creating that iconic ombre fade. You can use a regular wedge sponge or a more specialized nail art sponge.
-
Tweezers: These come in handy for holding the sponge while applying the polish, keeping things neat and precise.
-
Nail Polish Remover and Cotton Swabs: No matter how careful you are, things can get messy! Keep nail polish remover and cotton swabs nearby for easy cleanup around the edges and cuticles.
-
Top Coat: A high-quality top coat will seal your design, adding shine and protecting your hard work from chipping. It’s essential for making your ombre nails look salon-fresh and long-lasting.
Having these tools at hand will ensure you’re ready to achieve flawless ombre nails, whether you’re a beginner or have a bit more experience. Now that you’ve got your supplies lined up, it’s time to prep your nails for the best results!
Prepping Your Nails: The Key to Long-Lasting Ombre
A great manicure always starts with proper nail prep. Think of your nails as the canvas—if it’s not smooth and clean, your ombre design won’t last as long or look as sharp. Let’s walk through the basic steps to get your nails ready:
Clean Your Nails: Before you apply anything, make sure your nails are clean and free of any oils, old polish, or residue. Use a non-acetone nail polish remover for a gentle clean that won’t dry out your nails.
-
Shape Your Nails: Decide on the shape you want—whether it’s square, almond, oval, or stiletto—and file your nails accordingly. A uniform shape enhances the final look of your ombre nails.
-
Buff the Nail Surface: Lightly buffing the surface of your nails helps smooth out any ridges or imperfections. This step is key for ensuring the polish goes on evenly, especially when creating a gradient.
-
Push Back Your Cuticles: Use a cuticle pusher to gently push back your cuticles. This will give you a clean canvas to work on and prevent the polish from lifting at the base of your nails.
-
Apply a Base Coat: Once your nails are clean and prepped, apply a thin layer of base coat. This not only protects your nails from staining but also provides a smooth surface for the polish to adhere to. Allow it to dry completely before moving on to the next step.
Taking the time to properly prep your nails is crucial. Not only does it help your ombre design last longer, but it also makes the polish application smoother and more professional-looking. Now, with your nails prepped and ready, it’s time for the fun part—choosing your colours!

Choosing Your Colours: The Perfect Ombre Combination
Choosing the right colour combination is key to nailing the ombre look. While the technique is the same, the overall vibe of your nails will depend on the colours you choose. Are you going for something soft and understated, or bold and eye-catching? Let’s break down how to choose the perfect shades for your ombre nails:
Monochromatic Ombre: If you’re new to ombre nails, starting with a monochromatic look is a great option. Choose different shades of the same colour—like light pink fading into a deeper pink. This creates a subtle, elegant gradient that’s easy to blend.
-
Contrasting colours: Feeling adventurous? Try blending two contrasting colours for a bold look. For example, you could go from a bright yellow at the tips into a rich orange at the base. The contrast will make the gradient pop, perfect for those who want to make a statement.
-
Pastel Perfection: Ombre nails are stunning with pastel shades. Soft blues, pinks, and lilacs can blend effortlessly into one another, creating a dreamy, whimsical vibe. Pastels are also more forgiving when blending, making them ideal for beginners.
-
Neon Ombre: For those who love to stand out, neon ombre nails are a fun and vibrant choice. Electric pinks, greens, and yellows will fade into each other for a high-energy look that’s perfect for summer or parties.
-
Dark to Light: Another popular option is to blend from a dark colour to a light one. For example, a deep navy at the base can fade into a soft sky blue at the tips, or black can blend into grey or even a pale nude. This type of gradient gives a dramatic, sophisticated look.
-
Adding a Pop of Glitter: Want to take it up a notch? You can even incorporate glitter into your ombre. Start with a solid colour and fade into glitter for a glamorous twist on the classic ombre. This works especially well for special occasions or when you want to add a little extra sparkle.
When choosing your colours, make sure they are opaque enough to blend well. If the polish is too sheer, it will be difficult to get a smooth transition. Keep in mind that you can mix and match to create endless combinations—just make sure the colours complement each other!
With your colours selected, it’s time to get into the actual ombre application. There are two main techniques you can use—the sponge method and the brush method—both of which can give you beautiful results.

Sponge Technique: How to Get That Seamless Gradient
Now that you’ve chosen your colours, it’s time to dive into the most popular and beginner-friendly method for creating ombre nails—the sponge technique. This method uses a makeup sponge to blend the colours together, creating a soft, seamless gradient that fades beautifully from one shade to the next.
Here’s how to master the sponge technique step by step:
Prepare the Sponge: Take a clean makeup sponge and cut it into smaller, more manageable pieces if necessary. You’ll want a smooth side to work with, as this will be used to apply the polish. If you’re using a wedge-shaped sponge, the flat side is ideal for applying the gradient evenly across the nails.
-
Apply the Polish to the Sponge: On the flat side of the sponge, paint two (or more) stripes of nail polish directly onto the surface. For example, if you’re doing a two-colour ombre, paint one stripe of your lighter colour and one stripe of your darker colour right next to it, slightly overlapping where they meet. Make sure the stripes are wide enough to cover the entire width of your nail.
-
Test the Blend: Before applying it to your nails, dab the sponge onto a piece of paper to check how the colours blend. This will help you see if you need to add more polish or adjust the overlap for a smoother transition. Once you're happy with the blend, it’s time to apply it to your nails!
-
Dab the Sponge onto Your Nails: Gently press the sponge onto your nail, starting from the base and working your way up to the tip. Use a light dabbing motion to apply the polish, making sure the colours blend together as you move across the nail. You’ll want to dab several times to get full coverage and ensure the gradient looks smooth. Don’t worry if the first layer looks a bit uneven—ombre nails usually require 2-3 layers for a fully blended look.
-
Reapply Polish to the Sponge: After applying the first layer to all your nails, reapply the polish to the sponge and repeat the process. You may need to reapply the polish to the sponge after each nail to keep the colours vibrant and well-blended. This layering is what gives ombre nails their depth and smooth transition.
-
Allow Layers to Dry Between Coats: After each layer, give your nails a minute or two to dry slightly before applying the next coat. This will help prevent smudging and allow the colours to build up without becoming too thick or messy.
-
Repeat Until Desired Opacity is Achieved: Continue applying layers until you’re happy with the gradient. Usually, 2-3 coats are enough to get that perfect blend, but depending on the opacity of your polish, you may need to adjust.
The sponge method is great for achieving a soft, blended look, especially when working with colours that are similar in tone. With a little practice, you’ll be able to create flawless ombre nails that look like they were done by a professional.

Brush Technique: A Smoother Gradient with Precision
If you’re looking for a bit more control over your gradient or want to try a different method, the brush technique might be right for you. This method gives you more precision and works well for both subtle and bold ombre designs. The brush technique can also help you achieve a smoother transition between very contrasting colours.
Here’s how to do it:
Prepare Your Brush: You’ll need a small, flat brush or a fan brush to help blend the colours. A fan brush is particularly useful because its bristles are spread out, allowing for a more even blend between the polishes. Make sure the brush is clean and dry before you start.
-
Apply the Base colour: First, apply the lighter of your two polish colours as a base coat. This will give you a starting point for your gradient and help the second colour blend more smoothly. Let this base colour dry completely before moving on to the next step.
-
Dab the Second colour with a Brush: Once your base coat is dry, take the second colour and apply a small amount to the tip of your brush. Start at the tip of your nail and gently dab or stroke the colour onto your nail, moving downward toward the middle. You want to create a soft fade, so use light strokes and blend as you go.
-
Blend the colours: After applying the second colour, use the clean side of your brush to blend where the two colours meet. Gently stroke back and forth over the middle of the nail to soften the line between the two shades. Continue blending until you have a smooth gradient with no harsh lines.
-
Layer and Repeat: Similar to the sponge technique, you’ll need to layer the colours a couple of times to get the desired opacity. After each layer, give your nails a minute to dry, then repeat the process to intensify the gradient and smooth out the blend.
Sealing the Look: Top Coat for Shine and Durability
After all your hard work blending the colours, the final step in your ombre nail journey is to apply a top coat. This crucial step not only enhances the shine of your nails but also provides a protective layer that helps prevent chipping and extends the life of your manicure. Here’s how to do it right:
Choose the Right Top Coat: There are many types of top coats available, from glossy to matte finishes. For a classic, high-shine look that accentuates your ombre design, opt for a glossy top coat. If you prefer a more unique look, a matte top coat can give your ombre a chic, understated finish.
-
Apply a Generous Layer: Once your ombre design is completely dry, apply a generous layer of top coat. Start at the base of your nails and brush the top coat towards the tips, ensuring that you cover the entire nail surface evenly. Be sure to also cap the edges of your nails (the free edge) by applying the top coat slightly over the tip. This helps seal in the polish and prevent chipping.
-
Avoid Overworking the Top Coat: It can be tempting to go back and forth over your nails to ensure even coverage, but this can disrupt the layers underneath. Instead, apply the top coat in one smooth stroke from the base to the tip, and avoid going back over the same area multiple times.
-
Let It Dry: Allow your top coat to dry completely before doing anything with your hands. Depending on the top coat you choose, drying time may vary, so refer to the product instructions. For quicker drying, consider using a quick-dry top coat or a drying spray.
-
Check for Bubbles: If you notice bubbles forming in your top coat, it’s likely because you applied it too thickly or overworked the area. If this happens, you can gently smooth them out with a clean brush or a toothpick while the top coat is still wet.
-
Regular Maintenance: To keep your ombre nails looking fresh, consider applying a new layer of top coat every few days. This not only adds shine but also provides an extra layer of protection against wear and tear.
Sealing your ombre nails with a top coat gives them that final touch of polish and helps your beautiful gradient shine through. Once your top coat is dry, your ombre nails are ready to be shown off!

Cleaning Up: Perfecting the Edges for a Salon-Quality Finish
While creating ombre nails can be a fun and rewarding experience, it often comes with a bit of messiness around the edges. To achieve a polished, salon-quality look, it's essential to clean up the excess polish around your nails. Here’s how to do it effectively:
Use Nail Polish Remover: Dip a small brush or a cotton swab in nail polish remover. It’s best to use non-acetone remover as it’s gentler on the skin and won’t dry out your cuticles as much.
-
Carefully Clean Around the Edges: Gently run the brush or swab along the sides of your nails and around your cuticles to remove any excess polish. Take your time with this step to avoid smudging your ombre design. If you accidentally remove any polish from the nails, you can touch it up with your original colours.
-
Be Mindful of Cuticles: While cleaning up, be cautious not to get remover on your cuticles, as this can dry them out and lead to hangnails. If you do get some on your skin, follow up with a cuticle oil or moisturiser afterwards.
With your nails cleaned up, you’re now ready to flaunt your stunning ombre manicure!
Caring for Your Ombre Nails: Tips to Make Them Last
Now that you’ve mastered the art of ombre nails, it’s essential to know how to care for them to ensure they last as long as possible. Here are some tips for maintaining your beautiful manicure:
Avoid Hot Water: Try to avoid soaking your hands in hot water for extended periods, especially right after applying your nails. Hot water can weaken the polish and lead to chipping.
-
Use Gloves for Household Chores: Protect your nails from harsh chemicals and excessive moisture by wearing gloves while doing dishes or cleaning. This will help extend the life of your manicure.
-
Moisturize Your Cuticles: Keep your cuticles healthy by regularly applying cuticle oil. This helps prevent dryness and keeps your nails looking fresh and well-maintained.
With these tips and techniques, you’re now ready to rock your stunning ombre nails, showcasing your creativity and style with every gesture. Happy polishing!


